When it comes to mixing and mastering music, particularly for drum tracks, achieving the perfect balance of dynamics and tone is crucial. A well-compressed drum bus can make all the difference in elevating the overall sound of your music, adding punch, depth, and clarity to your drum mixes. With so many compression plugins and hardware units available on the market, selecting the right tool for the job can be overwhelming, especially for those new to music production. Whether you’re a seasoned audio engineer or just starting out, finding the ideal compressor to control and enhance your drum bus is essential for creating professional-sounding mixes.
In this article, we’ll delve into the world of compression, exploring the best compressors for drum buses that can help you take your drum mixes to the next level. From classic hardware compressors to modern plugin emulations, we’ll cover a range of options to suit different budgets, preferences, and production styles. With a focus on usability, sound quality, and versatility, our reviews and buying guide aim to provide you with the knowledge and insights needed to make an informed decision when choosing a compressor for your drum bus. By the end of this article, you’ll be equipped with the expertise to select the perfect compressor to enhance your drum mixes, ensuring they sound polished, balanced, and radio-ready.
We will discuss the best compressors for drum buses further down, but for now, consider checking out these related items on Amazon:


Last update on 2026-05-19 at 07:04 / Paid links / Images from Amazon Product Advertising API
Introduction to Compressors for Drum Buses
Compressors are essential tools in music production, particularly when it comes to managing the dynamics of drum buses. A drum bus refers to the collective audio signal of all the drums in a mix, including the kick, snare, toms, and overheads. Compressing the drum bus helps to control the overall level and tone of the drums, making them sound more cohesive and polished.
When used effectively, compressors can greatly enhance the sound of the drums, bringing out the nuances and details that might otherwise be lost in the mix. By reducing the dynamic range of the drum bus, compressors help to even out the levels, preventing the drums from overpowering other instruments in the mix. This is especially important in genres such as rock, pop, and hip-hop, where the drums play a prominent role in the overall sound.
In order to achieve the best possible sound, it’s crucial to choose the right compressor for the job. With so many different types of compressors available, each with its own unique characteristics and features, it can be overwhelming to decide which one to use. That’s why it’s helpful to research and compare the best compressors for drum buses, considering factors such as attack and release times, ratio, and makeup gain.
By understanding how compressors work and how to use them effectively, producers and engineers can take their drum sounds to the next level, creating a solid foundation for their mixes. Whether you’re working on a professional recording or a home demo, using a high-quality compressor can make all the difference in achieving a polished and professional sound. With the right compressor, you can create a drum sound that is both powerful and controlled, setting the stage for a great-sounding mix.
The Best Compressors For Drum Buses
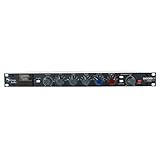
The
Empirical Labs Distressor EL8X-001
is a highly sought-after compressor for drum buses, known for its versatility and high-quality sound. It features a unique design that allows for a wide range of compression styles, from subtle to extreme. The Distressor is also highly regarded for its ability to add character and tone to drum mixes, making it a favorite among engineers and producers.
One of the key features of the Distressor is its ability to be used in a variety of different modes, including peak limiting, program compression, and gain reduction. This flexibility, combined with its high-quality components and rugged design, make it an ideal choice for use in professional recording studios. Whether you’re looking to add a subtle touch of compression to your drum mix or wanting to create a more dramatic effect, the Distressor is an excellent choice. Its reputation as one of the best compressors for drum buses is well-deserved, and it’s a valuable addition to any studio.
The
Neve 33609C-1001
is a legendary compressor that has been used on countless recordings over the years. It’s known for its smooth, musical sound and its ability to glue a drum mix together. The 33609C is a diode bridge compressor, which gives it a unique tone and character that is highly prized by engineers and producers. It’s also highly regarded for its ability to handle high levels of signal without distorting or coloring the sound.
One of the key features of the 33609C is its ability to be used in a variety of different applications, from subtle compression to extreme limiting. It’s also highly regarded for its ability to add warmth and character to drum mixes, making it a favorite among engineers and producers who want to add a vintage touch to their sound. The 33609C is a highly sought-after compressor, and its reputation as one of the best compressors for drum buses is well-deserved. Whether you’re working on a high-end recording project or just looking to add a professional touch to your drum mix, the 33609C is an excellent choice.
The
API 2500-002
is a highly respected compressor that is known for its clear, punchy sound and its ability to add depth and dimension to drum mixes. It features a unique design that allows for a wide range of compression styles, from subtle to extreme. The 2500 is also highly regarded for its ability to handle high levels of signal without distorting or coloring the sound. It’s a favorite among engineers and producers who want to add a professional touch to their drum mix.
One of the key features of the 2500 is its ability to be used in a variety of different modes, including peak limiting, program compression, and gain reduction. This flexibility, combined with its high-quality components and rugged design, make it an ideal choice for use in professional recording studios. The 2500 is also highly regarded for its ability to add a sense of energy and excitement to drum mixes, making it a favorite among engineers and producers who want to create a dynamic and engaging sound. Whether you’re working on a high-end recording project or just looking to add a professional touch to your drum mix, the 2500 is an excellent choice.
The
Tube-Tech CL1B-2001
is a highly sought-after compressor that is known for its warm, musical sound and its ability to add character and tone to drum mixes. It features a unique design that allows for a wide range of compression styles, from subtle to extreme. The CL1B is also highly regarded for its ability to handle high levels of signal without distorting or coloring the sound. It’s a favorite among engineers and producers who want to add a vintage touch to their drum mix.
One of the key features of the CL1B is its ability to be used in a variety of different applications, from subtle compression to extreme limiting. It’s also highly regarded for its ability to add a sense of warmth and cohesion to drum mixes, making it a favorite among engineers and producers who want to create a polished and professional sound. The CL1B is a highly respected compressor, and its reputation as one of the best compressors for drum buses is well-deserved. Whether you’re working on a high-end recording project or just looking to add a professional touch to your drum mix, the CL1B is an excellent choice.
The
Shadow Hills Master Compressor-001
is a highly respected compressor that is known for its clear, punchy sound and its ability to add depth and dimension to drum mixes. It features a unique design that allows for a wide range of compression styles, from subtle to extreme. The Master Compressor is also highly regarded for its ability to handle high levels of signal without distorting or coloring the sound. It’s a favorite among engineers and producers who want to add a professional touch to their drum mix.
One of the key features of the Master Compressor is its ability to be used in a variety of different modes, including peak limiting, program compression, and gain reduction. This flexibility, combined with its high-quality components and rugged design, make it an ideal choice for use in professional recording studios. The Master Compressor is also highly regarded for its ability to add a sense of energy and excitement to drum mixes, making it a favorite among engineers and producers who want to create a dynamic and engaging sound. Whether you’re working on a high-end recording project or just looking to add a professional touch to your drum mix, the Master Compressor is an excellent choice.
Why Compressors are Essential for Drum Buses
When it comes to music production, having a well-balanced mix is crucial for a professional-sounding track. One of the key elements in achieving this balance is controlling the dynamics of the drum bus. The drum bus refers to the collective sound of all the drum tracks in a mix, including the kick, snare, toms, and overheads. Without proper control, the drum bus can quickly become overwhelming and dominate the rest of the mix.
Compressors play a vital role in taming the drum bus and bringing it under control. By reducing the dynamic range of the drums, compressors help to even out the levels and prevent the drums from overpowering the rest of the instruments. This is especially important in genres such as rock, metal, and pop, where the drums are often a key element of the mix. By using a compressor to control the drum bus, producers and engineers can create a more balanced and polished sound.
In order to achieve the best results, it’s essential to choose the right compressor for the job. The best compressors for drum buses are those that can handle high levels of gain reduction without introducing unwanted distortion or artifacts. These compressors should also have a range of adjustable parameters, such as threshold, ratio, and attack, to allow for precise control over the compression. By selecting the right compressor and adjusting its settings carefully, producers and engineers can create a drum sound that is both powerful and controlled.
By using a compressor to control the drum bus, producers and engineers can take their mixes to the next level. With a well-controlled drum bus, the rest of the instruments in the mix can shine through and create a more balanced and engaging sound. Whether you’re working on a professional recording or a home demo, using a compressor to control the drum bus is an essential step in creating a high-quality mix. By investing in a good compressor and learning how to use it effectively, you can take your music production skills to new heights and create mixes that sound professional and polished.
Understanding Compression Techniques For Drum Buses
Compression techniques are essential for controlling the dynamic range of drum buses, ensuring a balanced and polished sound. By applying compression, engineers can even out the levels of individual drums, creating a cohesive and tight sound. This technique is particularly useful for genres that require a high-energy sound, such as rock and pop music. In these genres, compression helps to sustain the sound of the drums, making them sound more aggressive and driving.
One of the key benefits of compression is its ability to control the attack and release of the drums. By adjusting the attack time, engineers can determine how quickly the compressor responds to the signal, while the release time controls how long the compressor takes to return to its normal state. This allows engineers to tailor the sound of the drums to the specific needs of the mix. For example, a fast attack time can help to control the transient peak of a snare drum, while a slower release time can help to sustain the sound of a kick drum.
In addition to controlling the dynamic range, compression can also be used to add tone and character to the drums. By driving the compressor hard, engineers can create a warm and distorted sound that adds depth and complexity to the mix. This technique is often used in conjunction with other processing techniques, such as EQ and reverb, to create a unique and interesting sound. However, it’s essential to use compression judiciously, as over-compression can lead to a lifeless and flat sound.
The type of compressor used can also greatly impact the sound of the drums. Different compressors have distinct characteristics, such as tube, solid-state, or digital, each with its own unique tone and response. For example, a tube compressor can add a warm and vintage tone to the drums, while a digital compressor can provide a clean and precise sound. By choosing the right compressor for the job, engineers can achieve the desired sound and create a professional-sounding mix.
Key Features To Consider When Choosing A Compressor For Drum Buses
When choosing a compressor for drum buses, there are several key features to consider. One of the most important factors is the type of compression algorithm used. Different algorithms, such as peak limiting, RMS compression, and program-dependent compression, each have their own unique characteristics and uses. Peak limiting, for example, is useful for controlling transient peaks, while RMS compression is better suited for controlling the overall level of the signal.
Another essential feature to consider is the compressor’s ratio and threshold controls. The ratio control determines the amount of compression applied to the signal, while the threshold control sets the level above which compression is applied. By adjusting these controls, engineers can tailor the compression to the specific needs of the mix. For example, a high ratio and low threshold can be used to aggressively compress the drums, while a low ratio and high threshold can be used to apply subtle compression.
The attack and release times are also critical features to consider. The attack time determines how quickly the compressor responds to the signal, while the release time controls how long the compressor takes to return to its normal state. By adjusting these times, engineers can control the transient response of the drums and create a sense of space and depth in the mix. Additionally, some compressors offer advanced features, such as side-chaining and multi-band compression, which can be used to create complex and interesting effects.
In addition to these features, the compressor’s interface and usability are also important considerations. A well-designed interface can make it easy to navigate and adjust the compressor’s settings, while a poorly designed interface can be frustrating and time-consuming to use. By choosing a compressor with a intuitive and user-friendly interface, engineers can focus on the creative aspects of mixing and avoid technical difficulties.
Common Compression Techniques For Drum Buses
There are several common compression techniques used for drum buses, each with its own unique characteristics and applications. One of the most popular techniques is parallel compression, which involves blending the compressed signal with the original signal. This technique allows engineers to add compression to the drums without over-compressing the signal, creating a balanced and natural sound.
Another technique is serial compression, which involves using multiple compressors in series to achieve a specific sound. This technique can be used to create a highly compressed sound, with each compressor building on the previous one to create a dense and aggressive sound. However, serial compression can also be used to create a subtle and nuanced sound, by using each compressor to target specific frequencies or dynamics.
Multiband compression is another technique used for drum buses, which involves dividing the signal into multiple frequency bands and applying compression to each band separately. This technique allows engineers to target specific frequencies, such as the low-end of the kick drum or the high-end of the snare drum, and apply compression accordingly. By using multiband compression, engineers can create a highly detailed and controlled sound, with each frequency band contributing to the overall mix.
In addition to these techniques, engineers often use compression in conjunction with other processing techniques, such as EQ and reverb, to create a unique and interesting sound. By combining compression with these techniques, engineers can create a wide range of effects, from subtle and nuanced to aggressive and over-the-top. By experimenting with different compression techniques and combinations, engineers can develop their own unique sound and style.
Tips For Using Compressors On Drum Buses Effectively
To use compressors on drum buses effectively, it’s essential to understand the specific needs of the mix and the characteristics of the compressor being used. One of the most important tips is to start with a gentle compression ratio and threshold, and gradually increase the compression as needed. This approach allows engineers to avoid over-compressing the signal and creates a natural and balanced sound.
Another tip is to use the compressor’s metering and gain reduction displays to monitor the compression and adjust the settings accordingly. By watching the metering and gain reduction displays, engineers can see exactly how much compression is being applied and make adjustments to achieve the desired sound. Additionally, engineers should use their ears to judge the sound, rather than relying solely on the metering and displays.
It’s also essential to consider the overall balance of the mix when using compression on drum buses. Compression can greatly impact the balance of the mix, so engineers should be careful not to over-compress the drums and throw the mix out of balance. By using compression judiciously and in conjunction with other processing techniques, engineers can create a balanced and polished sound that enhances the overall mix.
In addition to these tips, engineers should experiment with different compression techniques and settings to develop their own unique sound and style. By trying out different approaches and techniques, engineers can discover new and interesting ways to use compression on drum buses and create a distinctive sound that sets them apart from other engineers. By combining technical knowledge with creativity and experimentation, engineers can achieve exceptional results and take their mixes to the next level.
Ultimate Buying Guide for Compressors to Enhance Your Drum Sound
When it comes to mixing and mastering music, particularly drum tracks, having the right compressor can make all the difference in achieving a polished and professional sound. With so many options available in the market, choosing the right compressor can be overwhelming, especially for those new to music production. In this guide, we will explore the key factors to consider when selecting a compressor for your drum bus, helping you make an informed decision to find the best compressors for drum buses that suit your needs and enhance your drum sound.
Threshold and Ratio
The threshold and ratio are two of the most critical parameters in a compressor. The threshold determines the level above which the compressor starts to reduce the signal, while the ratio determines the amount of reduction. A lower threshold and higher ratio mean that the compressor will reduce the signal more aggressively, resulting in a more controlled sound. On the other hand, a higher threshold and lower ratio will result in a more subtle compression. When choosing a compressor, consider the type of drum sound you are trying to achieve and adjust the threshold and ratio accordingly.
When adjusting the threshold and ratio, it’s essential to listen to the sound and make adjustments in small increments. This will help you find the sweet spot where the compression is noticeable but not overbearing. Additionally, consider the attack and release times, as these will also affect how the compressor responds to the signal. A faster attack time will result in a more immediate reduction, while a slower release time will allow the signal to recover more gradually. By finding the right balance between threshold, ratio, attack, and release, you can achieve a well-balanced and controlled drum sound.
Attack and Release Times
The attack and release times are crucial in determining how the compressor responds to the signal. The attack time determines how quickly the compressor reduces the signal after it exceeds the threshold, while the release time determines how quickly the compressor returns to its normal state after the signal drops below the threshold. Faster attack and release times are suitable for drums that require a tight, controlled sound, such as in metal or hard rock music. On the other hand, slower attack and release times are better suited for drums that require a more natural, dynamic sound, such as in jazz or acoustic music.
When choosing a compressor, consider the type of music you are producing and the sound you are trying to achieve. If you’re looking for a tight, controlled sound, look for a compressor with fast attack and release times. If you’re looking for a more natural, dynamic sound, look for a compressor with slower attack and release times. Additionally, consider the program-dependent nature of the attack and release times. Some compressors have fixed attack and release times, while others have program-dependent times that adjust based on the signal. Program-dependent times can provide a more natural, adaptive compression that responds to the nuances of the signal.
Makeup Gain
Makeup gain is an essential feature in a compressor, as it allows you to boost the signal after compression to compensate for the loss of level. This is particularly important when compressing drums, as the compression process can reduce the overall level of the signal. A good compressor should have a makeup gain stage that allows you to boost the signal to the desired level. When choosing a compressor, consider the amount of makeup gain available and whether it’s sufficient for your needs.
When using makeup gain, it’s essential to be careful not to overboost the signal, as this can introduce distortion and affect the overall sound quality. Start with a moderate amount of makeup gain and adjust to taste, listening to the sound and making adjustments in small increments. Additionally, consider the type of gain stage used in the compressor. Some compressors use a clean, transparent gain stage, while others use a colored, characterful gain stage that can add tone and texture to the signal. Choose a compressor with a gain stage that suits your needs and the type of sound you’re trying to achieve.
Soft Knee vs Hard Knee
The knee characteristic of a compressor determines how the compression is applied to the signal. A soft knee compressor applies compression gradually, with the amount of compression increasing as the signal exceeds the threshold. A hard knee compressor, on the other hand, applies compression abruptly, with the full amount of compression applied as soon as the signal exceeds the threshold. Soft knee compressors are suitable for drums that require a natural, dynamic sound, while hard knee compressors are better suited for drums that require a tight, controlled sound.
When choosing a compressor, consider the type of sound you’re trying to achieve and the knee characteristic that will best suit your needs. Soft knee compressors can provide a more subtle, nuanced compression that responds to the nuances of the signal, while hard knee compressors can provide a more dramatic, pronounced compression that can help control transient peaks. Additionally, consider the program-dependent nature of the knee characteristic. Some compressors have a fixed knee characteristic, while others have a program-dependent knee that adjusts based on the signal. Program-dependent knees can provide a more adaptive, responsive compression that responds to the changing dynamics of the signal.
Peak Limiting
Peak limiting is an essential feature in a compressor, as it helps prevent the signal from exceeding a certain level and introducing distortion. A good compressor should have a peak limiter that can catch transient peaks and prevent them from causing distortion. When choosing a compressor, consider the type of peak limiter used and whether it’s sufficient for your needs. Some compressors use a simple, threshold-based peak limiter, while others use a more advanced, lookahead-based peak limiter that can anticipate and catch transient peaks before they cause distortion.
When using peak limiting, it’s essential to be careful not to over-limit the signal, as this can introduce distortion and affect the overall sound quality. Start with a moderate amount of peak limiting and adjust to taste, listening to the sound and making adjustments in small increments. Additionally, consider the type of metering used in the compressor. Some compressors use a simple, peak-level meter, while others use a more advanced, RMS-level meter that can provide a more accurate representation of the signal level. Choose a compressor with metering that suits your needs and the type of sound you’re trying to achieve.
Stereo Linking
Stereo linking is an essential feature in a compressor, as it allows you to compress the left and right channels of a stereo signal together. This is particularly important when compressing drums, as the compression process can affect the stereo image and introduce imbalance. A good compressor should have a stereo linking feature that allows you to compress the left and right channels together, maintaining the stereo image and preventing imbalance. When choosing a compressor, consider the type of stereo linking used and whether it’s sufficient for your needs.
When using stereo linking, it’s essential to be careful not to over-compress the signal, as this can introduce imbalance and affect the overall sound quality. Start with a moderate amount of compression and adjust to taste, listening to the sound and making adjustments in small increments. Additionally, consider the type of linking used in the compressor. Some compressors use a simple, threshold-based linking, while others use a more advanced, gain-based linking that can provide a more accurate and nuanced compression. Choose a compressor with linking that suits your needs and the type of sound you’re trying to achieve.
FAQs
What is a drum bus compressor and how does it work?
A drum bus compressor is a type of audio compressor that is specifically designed to control the dynamic range of a drum bus, which is a submix of all the drum tracks in a music production. It works by reducing the volume of the drum bus when it exceeds a certain threshold, and then slowly releasing the compression when the volume drops below that threshold. This helps to even out the overall level of the drums and create a more cohesive sound.
The drum bus compressor is typically used to glue the drum sound together, making it sound more like a single unit rather than a collection of individual drums. It can also be used to add punch and energy to the drums, or to create a more subtle and restrained sound. By adjusting the threshold, ratio, attack, and release settings, you can tailor the compression to suit the specific needs of your music production. Whether you’re working on a rock, pop, or hip-hop track, a drum bus compressor can help you achieve a professional-sounding drum mix.
What are the key features to look for in a drum bus compressor?
When choosing a drum bus compressor, there are several key features to look for. First and foremost, you’ll want to consider the type of compression algorithm used, as this can greatly affect the sound and character of the compression. Some compressors use a peak limiting algorithm, while others use a more gentle, program-dependent algorithm. You’ll also want to consider the range of adjustable parameters, such as threshold, ratio, attack, and release, as these will allow you to tailor the compression to your specific needs.
In addition to the compression algorithm and adjustable parameters, you’ll also want to consider the overall sound quality and character of the compressor. Some compressors are designed to be transparent and uncolored, while others are designed to add a specific tone or character to the sound. You’ll also want to consider the ease of use and interface of the compressor, as well as any additional features it may offer, such as metering, sidechaining, or parallel compression. By considering these factors, you can choose a drum bus compressor that meets your specific needs and helps you achieve a great-sounding drum mix.
How do I choose the right drum bus compressor for my needs?
Choosing the right drum bus compressor for your needs involves considering a number of factors, including the type of music you’re producing, the sound you’re trying to achieve, and your personal preferences when it comes to compression. You’ll also want to consider your budget, as drum bus compressors can range from relatively affordable to very expensive. It’s a good idea to read reviews and listen to audio examples to get a sense of how different compressors sound and which one might be the best fit for your needs.
In addition to considering your specific needs and preferences, you may also want to consider seeking out recommendations from other producers or engineers who have experience with drum bus compression. You can also experiment with different compressors and settings to find what works best for you. Many plug-in compressors offer a free trial or demo version, which can be a great way to try before you buy. By taking the time to research and compare different options, you can find a drum bus compressor that helps you achieve a great-sounding drum mix and takes your music productions to the next level.
What is the difference between a hardware and software drum bus compressor?
A hardware drum bus compressor is a physical device that is used to compress the drum bus, whereas a software drum bus compressor is a plug-in that runs on your computer. Hardware compressors are often preferred by engineers who value the unique tone and character that they can add to a mix, as well as their tactile interface and ability to be used in a live setting. Software compressors, on the other hand, offer greater flexibility and convenience, as they can be easily inserted into a mix and adjusted using a digital interface.
In terms of sound quality, both hardware and software compressors can produce excellent results, and the choice between them often comes down to personal preference. Some engineers prefer the warmth and character of hardware compressors, while others prefer the precision and flexibility of software compressors. Ultimately, the choice between a hardware and software drum bus compressor will depend on your specific needs and workflow. If you’re working in a professional recording studio, you may prefer to use a hardware compressor, while if you’re working on a home studio setup, a software compressor may be more convenient and cost-effective.
Can I use a drum bus compressor on other instruments or groups?
While a drum bus compressor is specifically designed for use on the drum bus, it can also be used on other instruments or groups to great effect. For example, you might use a drum bus compressor on a vocal group or a submix of guitars to glue them together and create a more cohesive sound. You can also use a drum bus compressor on individual instruments, such as a bass or a snare drum, to add punch and energy or to control the dynamic range.
When using a drum bus compressor on other instruments or groups, it’s often a good idea to adjust the settings to suit the specific needs of the sound you’re working with. For example, you may want to use a slower attack and release on a vocal group to allow for more subtle compression, or a faster attack and release on a bass drum to add more punch and energy. By experimenting with different settings and techniques, you can find new and creative ways to use a drum bus compressor to enhance your mixes and add depth and interest to your sound.
How do I set up and use a drum bus compressor in my DAW?
To set up and use a drum bus compressor in your DAW, you’ll typically start by creating a new bus or submix and routing all of your drum tracks to it. You can then insert the drum bus compressor on the bus, either as a plug-in or as a hardware unit. From there, you can adjust the settings to suit the specific needs of your mix, such as the threshold, ratio, attack, and release.
Once you’ve got the compressor set up and adjusted, you can start to fine-tune the settings to get the sound you’re looking for. This might involve making adjustments to the threshold and ratio to control the amount of compression, or to the attack and release to adjust the timing and feel of the compression. You can also experiment with different compression algorithms and modes, such as peak limiting or program-dependent compression, to find the one that works best for your mix. By taking the time to properly set up and adjust your drum bus compressor, you can achieve a great-sounding drum mix that enhances your overall production.
What are some common mistakes to avoid when using a drum bus compressor?
One common mistake to avoid when using a drum bus compressor is over-compressing the drums, which can result in a lifeless and flat sound. This can happen when the threshold is set too low or the ratio is set too high, causing the compressor to reduce the volume of the drums too much. Another mistake is using too fast an attack time, which can cause the compressor to catch the transient of the drum sound and reduce its impact.
To avoid these mistakes, it’s a good idea to start with a moderate threshold and ratio and adjust from there, listening carefully to the sound and making adjustments as needed. You should also experiment with different attack and release times to find the one that works best for your mix. Additionally, it’s a good idea to use metering and visualization tools to help you understand what the compressor is doing and make more informed adjustments. By being mindful of these common mistakes and taking the time to properly adjust your drum bus compressor, you can achieve a great-sounding drum mix that enhances your overall production.
Final Thoughts
In the world of music production, achieving a well-balanced drum sound is crucial for a professional-sounding mix. This is where the right compression techniques come into play, allowing engineers to control dynamics and create a cohesive sound. With so many options available, selecting the ideal compressor can be a daunting task, especially for those new to the field. However, by understanding the key characteristics and features of different compressors, producers can make informed decisions that elevate their music to the next level.
Ultimately, finding the best compressors for drum buses is essential for any music producer or engineer looking to refine their drum sound. By considering factors such as attack and release times, ratio, and makeup gain, producers can choose a compressor that perfectly suits their needs. Whether working on a live recording or a studio production, the right compressor can make all the difference in achieving a polished and engaging sound. With the wealth of information available, producers can now make informed decisions and take their drum sound to new heights, creating a truly captivating listening experience for their audience.